Are Outlook Contact Groups Private? How to Manage and Create Secure Email Groups in Outlook
Key takeaways :
- Outlook contact groups can be managed to maintain privacy by using the BCC field to send emails to the group, ensuring that recipients can only see the sender and themselves.
- To manage the visibility of the BCC field in Outlook, users can access it by clicking on Options > BCC when creating a new email, and can hide it by clicking on Options > BCC from any email.
- For creating an email group in Outlook, users can follow similar steps in both the current version of Outlook and Outlook Online, with the option to set the privacy setting of the group as private or public.
- When creating an email group in Outlook, users can name the group, select the privacy setting, choose the folder to save the group, and add members from personal contacts, Global Address List (GAL) members, or new email contacts.
- Users can also create an Email Group (Microsoft 365 Group) in the current version of Outlook, with the steps being similar to creating a contact group, but with different interface screens.
How to Manage Contact Groups in Outlook
— Decoding the Differences: Microsoft Exchange vs. Outlook – Which One Suits You Best?
In Outlook, you have the option to:
The BCC field is not visible by default when you create a new email, but accessing it is easy. Open a new mail in Outlook and click Options > BCC. This will display the BCC field in the new mail. You have to do this once only. In the future, all emails will show the BCC option. If you want to hide the BCC field, click Options > BCC from any email, and it won’t appear again. Now that it’s visible, enter your name in the To field and your contact group in the BCC field. Everyone in the contact group will get the email, but they’ll be able to see only the person who sent it (you) and the person in the To field (also you).
Creating an Email Group in Outlook
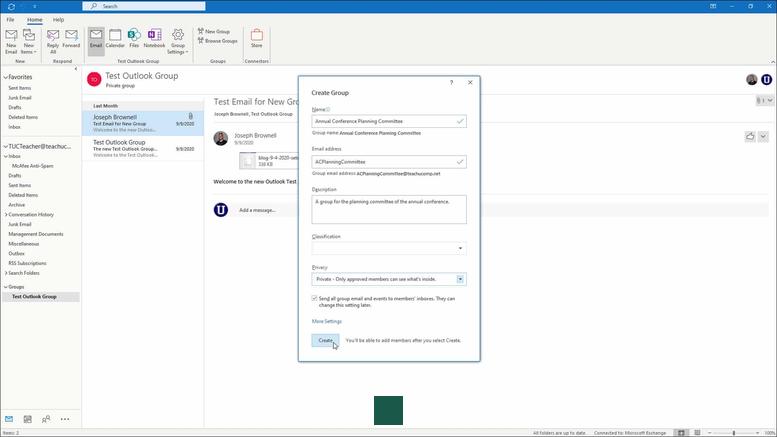
If you are still using the current version of Outlook, then you can also create an Email Group (Microsoft 365 Group). The steps are basically the same, only the screens look different:
- In Outlook click on Contacts
- Click on New Group
We will need to go through the same steps as with Outlook Online. So give your new email group a name (3), set the privacy setting (4) of the group (private or public), and click on Create.
- On the Outlook Navigation bar, click People.
- Under My Contacts in the left pane, choose the folder where you want to save your email group. Typically, you’ll select the Contacts folder.
- On the Home tab of the ribbon, click New Contact Group.
- Name your group. In a new window that appears, type a descriptive name for your group in the Name field.
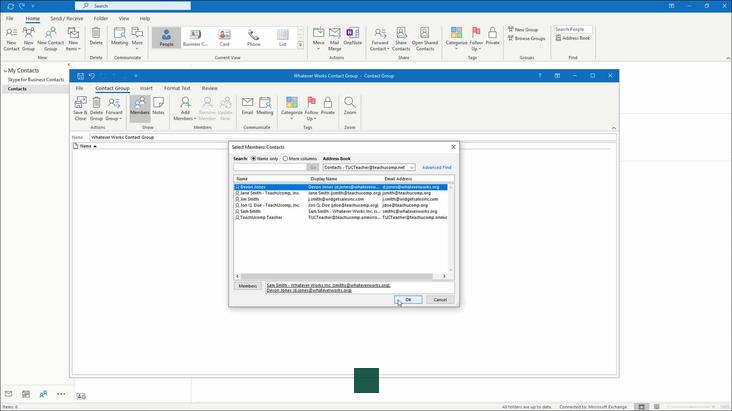
- Add members. Click the Add Members button on the ribbon. Then, depending on your source, choose one of these options:
- From Outlook Contacts for personal contacts.
- From Address Book for Global Address List (GAL) members.
- New Email Contact for individuals not in your contacts list.
- Select members. If you are adding existing contacts from Outlook or Global Address List, you can select multiple entries by holding down the Ctrl key and clicking on their names. Then click on Members and then OK. If you are adding a new contact, then type the name and email address in the corresponding fields and click OK. Repeat this step for each new contact you want to add to your group.
- Review and save. Review the list of members to ensure all necessary contacts are included, and then click the Save & Close button on the ribbon to save your newly created email group.
That’s it! You have successfully created a contact group in Outlook. To use it, simply type the name of your group in the To, Cc or Bcc field when composing a new message.
Key Takeaways
To create a contact group (distribution list) in Outlook on Windows, click the People icon and Contacts > New Contact Group. Enter a name for the group, add your members, then click Members > OK > Save & Close. You can also create a distribution list inside Outlook for Mac and on the web. Do you often send emails to a specific set of people at once? By creating a contact group in Outlook, (formerly a distribution list) you can email all necessary recipients by simply entering the group name. We’ll show you how to create a distribution list in Outlook for Windows, Mac, and the web.