Mastering Automated Email Sending with Outlook: A Step-by-Step Guide
Key takeaways :
- Setting up automated emails in Outlook allows for messages to be sent out at specific times without manual intervention.
- Entering recipient details, email content, and using advanced options is the first step in scheduling automated emails in Outlook.
- Testing the recurring email to ensure it functions correctly is an important step in the setup process.
- Automating email sending in Outlook involves creating the email message, choosing the Send Later option, and setting the recurrence frequency.
- Managing automatic replies in Outlook’s desktop version can be easily done by toggling the switch to ‘On’ and customizing separate messages for internal and external contacts.
How to Send Automated Emails Using Outlook
Setting up automated emails in Outlook is a convenient way to ensure your messages are sent out at specific times without manual intervention. Follow these steps to schedule and send automated emails using Outlook:
Lisez aussi Unlocking the Mystery: Fixing Outlook Typing Issues in Email Body
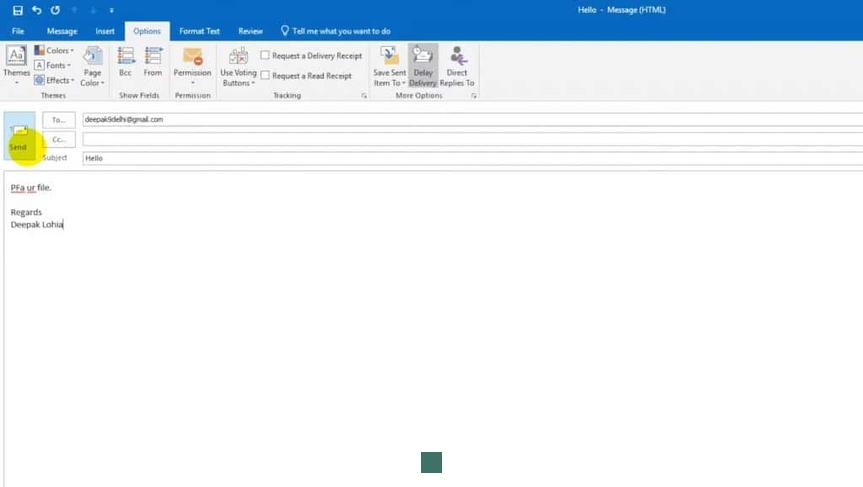
Step 1: Enter Recipient Details and Email Content
Begin by entering the email addresses of recipients, along with a subject and the body of the email. Afterward, click on Show advanced options to include CC, BCC, attachments, and set the importance of your email. Finally, click on Save to apply your changes.
Test Your Recurring Email
To verify that your scheduled email functions correctly, conduct a test run in Outlook by following these steps:
1. Click on Test at the top right-hand corner of the page to initiate a test run of your newly created recurring email flow.
2. Click on Test Flow Manually and then select Save & Test.
During the setup process, you can specify the frequency of your automated emails (daily, weekly, or monthly) in the Recurring settings window.
After setting up the schedule, click ‘Create Recurring Email’ to complete the process. This feature is particularly useful for ensuring timely communication with your subscribers or contacts on specific dates.
Automate Email Sending in Outlook
To automate the sending of scheduled emails in Outlook, follow these steps:
Create your email message and choose the Send Later option. Then, select Schedule Recurring Message, set the initial send date and time, choose the recurrence frequency, and save your settings to activate the automated email schedule.
Easily manage your automatic replies in Outlook’s desktop version by following these steps:
À lire : Switching from Outlook to Gmail: A Comprehensive Comparison and Migration Guide
1. Click on the gear icon in the top right corner.
2. Navigate to ‘Mail’ and then select ‘Automatic replies.’
3. Toggle the switch to ‘On’ to activate automatic replies and set the start and end dates as needed.
4. Customize separate messages for internal and external contacts if required. Save your settings to finish the setup.
If you encounter issues with the Automatic Replies feature, you can set up rules to send out of office messages to incoming emails. For detailed instructions, refer to the relevant help documentation.
Additional Automated Email Configuration on Outlook Web
For users accessing Outlook on the web, here are instructions for setting up and managing automatic replies:
- Sign in to Outlook on the web.
- Go to Settings > Automatic replies.
- Select the option for ‘Send automatic replies’.
- Configure the time period for automatic replies to be active.
- Customize settings for calendar availability, meeting invitations, and message content.
- Once satisfied with your settings, save the changes.
- Access advanced email automation settings by selecting ‘Manage Rules & Alerts’ under the File tab in Outlook.
- Create a new rule and apply it to incoming messages.
- Select actions to reply using a specific template.
- Complete the rule setup, including exceptions if necessary.
- Assign a name to the rule (e.g., Out of Office) and enable it to start sending automatic replies.
Remember to keep Outlook running to ensure that automatic replies are sent in your absence.